If you’re making milk kefir at home, you know how important your kefir grains are. These tiny, living cultures do all the hard work of turning milk into a delicious, probiotic-rich drink.
But what happens when you need to take a break from brewing? Or when you want to keep your grains healthy for longer periods? Knowing how to store milk kefir grains properly is key to keeping them alive and active.
You’ll discover simple, effective methods to store your kefir grains whether it’s for a few days, weeks, or even months. Keep reading to make sure your grains stay fresh and ready to make your next batch of kefir perfect every time!

Credit: www.youtube.com
Short-term Storage
Short-term storage of milk kefir grains helps keep them healthy between uses. Proper care during this period ensures grains stay active and ready for fermentation. The key is to slow their activity without damaging them.
Refrigeration Basics
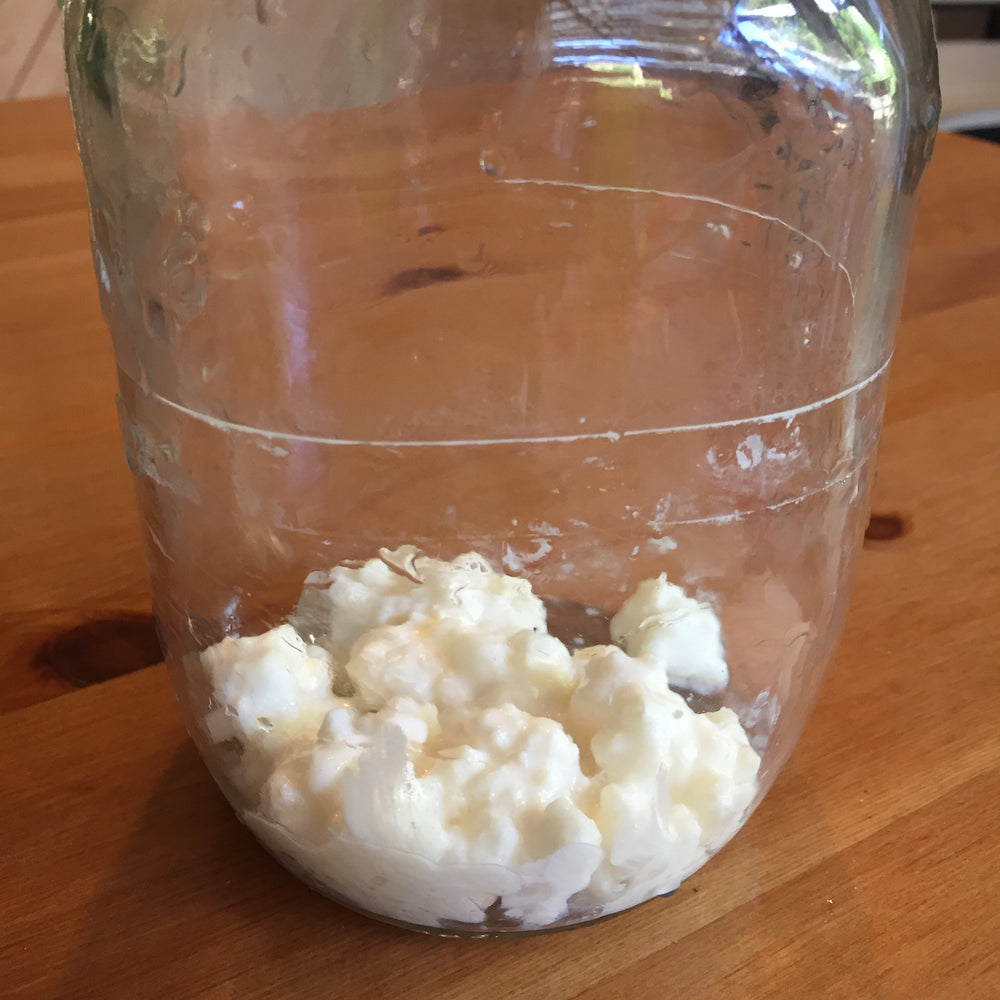
Store milk kefir grains in a clean glass jar. Cover the grains with fresh milk. Seal the jar with a lid to prevent contamination. Place the jar in the refrigerator. Cold temperature slows fermentation but does not stop it completely. Grains will still consume lactose during refrigeration.
Using Fresh Milk
Always use fresh milk for storage. The milk provides nutrients to keep grains alive. Avoid using ultra-pasteurized or flavored milk. Whole or low-fat milk works best. Fresh milk prevents grains from becoming weak or dying.
Frequency Of Milk Changes
Change the milk every 5 to 7 days during short-term storage. This prevents grains from starving. If left too long, grains may lose strength. Replace milk sooner if it smells sour or changes color. Regular milk changes keep grains healthy and active.
Long-term Storage
Long-term storage of milk kefir grains allows you to pause fermentation without losing your grains. Proper methods keep grains healthy and ready for use later. This section covers freezing, drying, and ways to avoid freezer damage. Each method suits different time frames and storage conditions.
Freezing Milk Kefir Grains
Freezing is a common way to store kefir grains for months. Rinse grains gently with filtered water to remove milk residue. Pat them dry using a clean paper towel. Place grains in a small airtight container or freezer bag. Add a little milk powder to protect the grains during freezing. Label the container with the date before placing it in the freezer.
Drying And Dehydration Methods
Drying kefir grains is an alternative for long-term storage. Rinse grains carefully and spread them on a clean paper towel. Let grains air dry at room temperature for 24 to 48 hours. Avoid direct sunlight to prevent damage. Once fully dried, store grains in an airtight container or zip-lock bag. Keep the container in a cool, dry place away from moisture.
Preventing Freezer Burn
Freezer burn damages kefir grains and reduces their activity. To prevent this, remove as much air as possible from the storage bag. Use vacuum sealers or press out air manually before sealing. Wrap the container with extra insulation, like a cloth or bubble wrap. Store grains in the coldest part of the freezer, away from the door. Thaw grains slowly at room temperature before use for best results.
Preparing Grains For Storage
Preparing milk kefir grains for storage helps keep them healthy and active. Proper preparation stops damage during cold or long-term storage. This step ensures grains stay fresh and ready for fermentation when you use them again.
Follow simple steps to prepare kefir grains correctly. Clean grains gently, dry if needed, and select the best containers. These steps protect grains from contamination and freezer burn.
Rinsing Techniques
Rinse kefir grains with filtered, non-chlorinated water only if necessary. Do this gently to avoid breaking the grains. Use cool or room temperature water to keep grains safe. Avoid soap or harsh chemicals as they harm the grains.
Drying Before Freezing
Pat grains dry carefully with a clean paper towel. Remove excess moisture to prevent ice crystals forming during freezing. Avoid rubbing grains to keep their shape intact. Dry grains freeze better and survive longer without damage.
Choosing The Right Containers
Pick airtight, freezer-safe containers or bags for storing grains. Glass jars with tight lids work well for short-term fridge storage. For freezing, use plastic bags or containers that seal completely. Label containers with the date to track storage time easily.

Credit: www.youtube.com
Reactivating Stored Grains
Reactivating stored milk kefir grains is essential to bring them back to life after freezing or dehydration. Proper reactivation ensures the grains regain their full fermenting power. The process varies depending on how the grains were stored. Careful handling helps maintain their health and quality. This section explains simple steps to revive your kefir grains effectively.
Thawing Frozen Grains
Remove frozen grains from the freezer and place them in a clean container. Let them thaw naturally at room temperature. Avoid using heat to speed up thawing, as this can damage the grains. Once thawed, rinse gently with filtered water to remove any ice crystals. Transfer the grains into fresh milk to start fermentation again.
Reviving Dehydrated Grains
Dehydrated grains need gradual rehydration to regain activity. Soak them in fresh milk at room temperature for 24 to 48 hours. Stir gently once or twice daily to distribute the milk evenly. Replace the milk every 24 hours until the grains begin to swell and look plump. This slow process helps restore their fermenting ability.
Adjusting Fermentation Time
After reactivating stored grains, fermentation may slow down. Expect longer fermentation times during the first few batches. Monitor the kefir closely for taste and texture changes. Gradually, the grains will regain their usual speed and strength. Adjust fermentation length based on your desired sourness and thickness.
Vacation And Break Tips
Taking a break from making milk kefir does not mean your grains have to suffer. Proper storage during vacations or pauses keeps grains healthy and ready to use. Different breaks need different care. Some methods work better for short rests, others for longer absences. Follow these tips to keep your kefir grains alive and active.
Storing Grains During Short Breaks
For breaks up to one week, place grains in fresh milk. Use a clean glass jar and seal it tightly. Store the jar in the refrigerator to slow fermentation. Change the milk every two to three days to prevent starvation. Avoid rinsing the grains before storage to keep beneficial bacteria intact. This simple method keeps grains healthy for a short rest.
Extended Absence Storage
For breaks longer than one week, grains need more careful care. Place grains in fresh milk with a higher volume to feed them longer. Store in the refrigerator and change the milk weekly. Another option is freezing the grains. Rinse gently, pat dry, and place in a freezer-safe container with a little milk powder. Freeze quickly to prevent damage. Thaw grains slowly at room temperature before use.
Maintaining Grain Health
Grains need food, moisture, and the right temperature. Avoid letting grains dry out or stay in milk too long without changing it. Keep grains away from direct sunlight and extreme heat. Use filtered water if rinsing is needed. Always handle grains gently to avoid damage. Regularly check grains for color or smell changes to spot issues early. Healthy grains produce creamy, tangy kefir every time.
Common Mistakes To Avoid
Storing milk kefir grains properly is key to keeping them healthy and active. Many beginners make simple mistakes that harm the grains. Avoiding these errors helps your grains stay strong and produce tasty kefir.
Here are some common mistakes to avoid when storing milk kefir grains. Following these tips will improve your kefir-making experience.
Overfeeding Or Starving Grains
Giving too much milk can drown the grains. They may not ferment well and become weak. On the other hand, not providing enough milk starves the grains. They need enough lactose to stay alive and active. Use the right milk amount based on how long you store them. For longer storage, increase milk quantity to feed the grains properly.
Using Contaminated Containers
Dirty jars or utensils introduce harmful bacteria. This can spoil the grains or kefir. Always use clean, sterilized containers for storage. Avoid plastic containers that can scratch and hold bacteria. Glass jars with airtight lids work best. Clean containers prevent contamination and keep grains healthy.
Ignoring Temperature Guidelines
Milk kefir grains react to temperature changes. Storing them too warm speeds up fermentation and may exhaust the grains. Too cold temperatures can slow activity and stress the grains. The ideal fridge temperature is around 35-45°F (2-7°C). Keep grains in the main fridge area, not in the door where temperatures vary. Proper temperature preserves grain vitality and kefir quality.
Troubleshooting Storage Issues
Proper storage of milk kefir grains is crucial for their health and fermentation quality. Sometimes, issues arise despite careful storage. Troubleshooting these problems helps maintain strong, active grains. Understanding common signs and solutions can save your kefir culture.
Signs Of Grain Damage
Damaged kefir grains often appear slimy or mushy. They might lose their usual white, cauliflower-like texture. A sour or off smell can also indicate spoilage. Grains that do not ferment milk or produce weak kefir are likely stressed or harmed. Watch for discoloration or black spots, which signal mold or contamination.
Recovering Weak Grains
Place weak grains in fresh milk daily to boost their strength. Use whole milk for the best nutrients. Avoid rushing the process; recovery can take several days. Discard any grains that remain soft or smelly after a week. Stir gently and keep the jar covered but breathable. This encourages healthy fermentation and grain growth.
Preventing Mold And Contamination
Always use clean jars and utensils to avoid contamination. Store grains in fresh milk and change it regularly. Keep grains in the refrigerator during long breaks but feed them weekly. Avoid sealing grains in airtight containers without milk; they need oxygen. If mold appears, discard the grains immediately to prevent health risks.
Credit: www.yemoos.com
Frequently Asked Questions
Can Kefir Heal H Pylori?
Kefir may help reduce H. pylori growth due to probiotics but cannot fully heal the infection. Medical treatment is necessary.
Is Kefir Ok For Type 2 Diabetes?
Kefir can be suitable for type 2 diabetes due to its probiotics and low glycemic impact. Monitor blood sugar levels closely.
How Long Can I Leave Kefir Grains In The Fridge?
Store kefir grains in fresh milk inside a sealed container in the fridge. Use within 1-2 weeks for best results. Change milk weekly to keep grains healthy.
Can Kefir Help With Sibo?
Kefir contains probiotics that may support gut health and help balance bacteria. It might ease SIBO symptoms but isn’t a cure. Consult a healthcare professional for proper diagnosis and treatment.
Conclusion
Proper storage keeps milk kefir grains healthy and active. Always use fresh milk and clean containers. Refrigerate grains to slow fermentation but feed them weekly. For longer breaks, freezing or dehydrating works well. Remember to thaw or rehydrate grains before use.
Caring for your grains ensures tasty kefir every time. Keep it simple, consistent, and your grains will thrive.