Are you tired of dealing with a leaky or outdated kitchen faucet? Imagine the satisfaction of transforming your kitchen’s centerpiece when you replace kitchen faucet with sprayer, upgrading it into a sleek, modern fixture that makes daily tasks easier and more enjoyable.
Not only does this upgrade enhance your kitchen’s functionality, but it also adds a touch of style and convenience that could make your daily chores a breeze. In this guide, you’ll discover the simple steps to replace your kitchen faucet with a sprayer, even if you’re not a seasoned DIY enthusiast.
With a little patience and our easy-to-follow instructions, you’ll have your new faucet installed and working in no time. Ready to dive in and give your kitchen the facelift it deserves? Keep reading to uncover the secrets to a successful faucet replacement.
Tools And Materials Needed
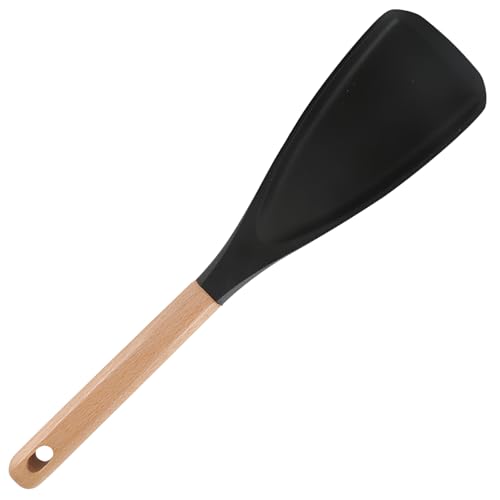
Replacing a kitchen faucet with a sprayer requires a few essential tools and materials. Gather an adjustable wrench, plumber’s tape, basin wrench, and a bucket. You’ll also need the new faucet and sprayer kit. These tools ensure a smooth and efficient installation process.
Replacing a kitchen faucet with a sprayer can be a rewarding DIY project, transforming your sink area with improved functionality. Before you get started, it’s crucial to gather the right tools and materials. Having everything on hand will not only save time but also ensure the process goes smoothly, making your kitchen upgrade a stress-free experience.
Tools You’ll Need
You’ll need a few essential tools to tackle this project efficiently. A wrench, particularly an adjustable one, will be your best friend when loosening and tightening nuts. If you’ve ever struggled to reach those tight spots under the sink, a basin wrench is invaluable for accessing hard-to-reach areas without straining your back. Don’t overlook the importance of having a screwdriver on hand. It’s often required for fastening the sprayer and faucet components securely. If you’ve replaced fixtures before, you might have a pair of pliers in your toolbox. They come in handy for gripping small parts and pulling hoses through cramped spaces.
Materials Required
Choosing the right materials is just as important as the tools. You will need a new kitchen faucet that includes a sprayer attachment. Ensure the faucet fits your sink’s configuration, whether single or multiple holes. If you’re unsure, it’s wise to measure your sink beforehand. You’ll also need plumbing tape, often referred to as Teflon tape. This might seem like a minor detail, but it’s essential for sealing threads and preventing leaks. If you’ve ever dealt with a leaky faucet, you know how frustrating it can be. Plumbing tape is a small investment that can save you from future headaches.
Safety Precautions
Safety is paramount when working on plumbing projects. Consider wearing gloves to protect your hands from sharp edges and rough surfaces. If you’ve ever skinned a knuckle while working under a sink, you’ll appreciate the added layer of protection. Ensure you turn off the water supply before starting. It might sound obvious, but in the excitement of a new project, it’s easy to overlook. Double-check to avoid an unexpected deluge in your kitchen.
Additional Supplies
Sometimes, additional supplies might be necessary based on your sink’s layout. If your faucet setup requires a new mounting bracket, have it ready. You’ve probably encountered situations where the old bracket is worn out or incompatible with the new fixture. Consider having a small bucket or towel to catch any residual water when disconnecting the old faucet. This simple step can prevent water damage to your cabinets and floors. Isn’t it satisfying when everything comes together seamlessly? With these tools and materials ready, you’ll find replacing your kitchen faucet with a sprayer not only manageable but also enjoyable. What other projects have you tackled that required meticulous preparation?
Preparing The Workspace
Start by clearing the area under the sink for easy access. Gather necessary tools like a wrench, pliers, and a bucket. Ensure proper lighting to see clearly while working. Remove any clutter to create a safe and organized workspace.
Preparing the workspace is a crucial first step when replacing your kitchen faucet with a sprayer. This ensures a smooth process and prevents potential hiccups down the road. Whether you’re a seasoned DIY enthusiast or a first-time fixer-upper, setting up your workspace properly can make the difference between a seamless installation and a frustrating ordeal. Plus, who doesn’t love starting a project without unnecessary clutter and chaos? Clearing the Sink Area Before you dive into the task, take a moment to clear the sink area. Remove any items that might obstruct your workspace, like dish racks, soap dispensers, or any decorative pieces. This not only gives you more room to maneuver but also prevents any accidental damage to your belongings. Imagine reaching for a tool and knocking over your favorite vase—it’s best to avoid such mishaps. Consider laying down a towel or mat on the floor to catch any falling tools or water spills. This small precaution can save you from potential slips or damage to your flooring. Do you have a toolbox? Keep it within arm’s reach to avoid unnecessary trips across the kitchen. Turning Off Water Supply Now, let’s focus on the water supply. This step is vital to prevent any unexpected water sprays while you’re working. Locate the shut-off valves under the sink. These are usually small knobs attached to the pipes leading to your faucet. Turn the valves clockwise to shut off the water supply. You might need a bit of muscle, especially if they haven’t been turned in a while. If you’re having trouble, a pair of pliers can come in handy. Ensure the water is completely off by testing the faucet. No water flow means you’re good to go. Think about this: how often do we overlook these small knobs until they become essential? This is a perfect opportunity to ensure they’re in good working order. If they’re rusty or hard to turn, it might be worth considering a replacement. After all, a little maintenance now can save you from headaches later. By preparing your workspace thoughtfully, you set the stage for a successful faucet replacement. Ready to tackle the next steps with confidence?
Removing The Old Faucet
Replacing a kitchen faucet with a sprayer can transform your sink area. It starts with removing the old faucet. This step is crucial for a smooth installation. Begin by gathering necessary tools. A wrench, pliers, and a bucket are essential. Ensure the water supply is off before starting.
Detaching Water Lines
Locate the water shut-off valves under the sink. Turn them clockwise to stop water flow. Use a wrench to loosen the nuts on the water lines. Place a bucket underneath to catch any drips. Carefully detach the lines from the faucet. This prevents any water damage.
Loosening Mounting Nuts
Find the mounting nuts under the sink. Use a basin wrench for tight spaces. Turn the nuts counterclockwise to loosen them. This can be challenging. Patience is key. Ensure all nuts are removed before lifting the faucet.
Lifting Out The Old Faucet
Check that all connections are detached. Gently lift the old faucet out of the sink. Be cautious to avoid scratching the sink. Inspect the area for any debris or old sealant. Clean the sink surface before installing the new faucet.
Installing The New Faucet
Replacing a kitchen faucet with a sprayer involves removing the old fixture and securing the new one. Ensure all connections are tight to prevent leaks. Test the sprayer for smooth operation and check for any dripping.
Installing a new kitchen faucet with a sprayer can seem daunting, but it’s a manageable task with the right guidance. Whether you’re a DIY enthusiast or just looking to save a few bucks, replacing your faucet can be a rewarding project. Plus, it can transform the look and functionality of your kitchen. Here’s a breakdown of how you can tackle the installation phase, one step at a time.
Positioning The New Faucet
Start by ensuring you have all the necessary tools and parts. Lay them out on your countertop for easy access. Before positioning the faucet, check your sinkholes. Make sure they align with the new faucet’s configuration. Sometimes, you may need to adjust or cover unused holes. Once aligned, position the faucet over the sinkholes. Hold it steady and ensure it’s centered and aligned correctly. It’s like setting the foundation for a house—critical for stability and appearance.
Securing The Faucet In Place
Now that the faucet is positioned, it’s time to secure it. Use the provided nuts and washers that came with your faucet. From underneath the sink, thread the nuts onto the faucet’s tailpieces. Hand-tighten them first to avoid cross-threading. Remember, patience here will save you from leaks later. Finally, use a basin wrench to tighten the nuts securely. Don’t over-tighten, as it could damage the faucet or sink. Tighten just enough to feel resistance, ensuring a snug fit. Does this sound like something you can handle? It’s simpler than it seems, and you’ll feel accomplished once you see the faucet standing firm and ready for use.
Connecting The Sprayer
Attach the sprayer hose to the designated outlet on the kitchen faucet. Ensure the connection is secure to prevent leaks. Test the sprayer by turning on the water and checking for proper flow and pressure.
Connecting the sprayer to your new kitchen faucet is a crucial step that adds convenience and versatility to your sink area. A sprayer can make rinsing dishes and cleaning your sink much easier. Before you start, ensure that you have all the parts needed, including the sprayer hose, diverter, and sprayer head. Having everything ready will save you time and prevent frustration.
Attaching Sprayer Hose
Start by locating the diverter on your faucet. This is where the sprayer hose connects. If you’re unsure, check the faucet’s manual for guidance. Next, attach one end of the sprayer hose to the diverter. Make sure it’s secure by tightening it with your hands, and use a wrench if necessary. Connect the other end of the hose to the sprayer head. Again, ensure it’s tight to prevent any leaks. It’s amazing how a simple connection can make such a difference in your kitchen routine.
Testing Sprayer Functionality
Once everything is connected, it’s time to test the sprayer. Turn on the water and check for leaks around the connections. If you find any, tighten the connections until they stop. Test the sprayer by pressing the handle. Does the water flow smoothly without any sputtering? If not, you might need to check the connections again. Reflect on how easy tasks become with the sprayer in action. Imagine rinsing those large pots and pans with ease. Does it inspire you to tackle other DIY projects at home? Consider the peace of mind knowing your kitchen is now even more functional. A sprayer can make a big difference, enhancing your cooking and cleaning experience. Remember, if you’re ever in doubt, don’t hesitate to consult a professional. Your safety and the integrity of your kitchen come first.
Reconnecting Water Supply
Replacing a kitchen faucet with a sprayer can enhance your kitchen’s functionality. Begin by turning off the water supply. Remove the old faucet, then install the new one, ensuring a snug fit. Reconnect the water lines and test for leaks, making adjustments if necessary.
Reconnecting the water supply is a crucial step when replacing your kitchen faucet with a sprayer. Picture this: you’ve successfully removed the old faucet and installed the new one, but now it’s time to bring it all together. This is where attention to detail makes all the difference. Getting this step right ensures that you won’t have any unexpected surprises later. Let’s delve into the specifics of reconnecting your water supply with confidence and precision.
Attaching Water Lines
Start by identifying the hot and cold water lines. They are typically labeled red for hot and blue for cold, but if not, a simple touch test can help. Connect the corresponding lines to the faucet’s inlets. Be sure to tighten the connections with a wrench, but avoid overtightening. This prevents damaging the threads, which can lead to leaks. Personal tip: I’ve found wrapping plumber’s tape around the threads before attaching the lines provides an extra layer of protection against leaks. Have you tried it?
Checking For Leaks
Once the water lines are attached, it’s time to test for leaks. Turn on the water supply slowly and watch closely for any drips or puddles forming around the connections. A flashlight can be handy in spotting hidden leaks behind the sink. Keep a towel nearby for quick clean-up of any spills. If you notice any leaks, pause and re-tighten the connections. Sometimes, simply adjusting the angle of the connection resolves the issue. Have you ever thought about how small adjustments can make a big difference? By following these steps, you are on your way to enjoying a leak-free, efficient kitchen faucet with a sprayer. The satisfaction of completing a project like this is unmatched, especially when it works seamlessly.
Final Touches And Cleanup
Ensure all connections are tight and secure to prevent leaks. Test the faucet and sprayer for smooth operation. Wipe the area clean, removing any debris or water spots for a polished finish.
Replacing a kitchen faucet with a sprayer is a rewarding task. It’s essential to finish strong with the final touches and cleanup. This step ensures everything is neat and works perfectly. Let’s dive into the details.
Cleaning The Area
Start by removing any debris or tools. Wipe down the countertop and sink. Use a gentle cleaner to remove any marks. Make sure to clean around the faucet base. This prevents water spots and makes your sink shine. Dry the area with a clean cloth. It leaves a polished look.
Ensuring Proper Functionality
Test the faucet and sprayer. Turn the water on and check for leaks. Adjust the connections if needed. Make sure the sprayer works smoothly. Check the water pressure. Ensure the handle moves easily. Verify that hot and cold settings work. Adjust as necessary for smooth operation.
Frequently Asked Questions
How To Replace A Kitchen Faucet With A Sprayer?
Turn off the water supply. Remove the old faucet and sprayer. Install the new faucet and secure connections. Attach the sprayer hose and check for leaks. Restore the water supply.
How Much To Change A Kitchen Faucet With A Sprayer?
Changing a kitchen faucet with a sprayer costs $150 to $350, including parts and labor. Prices vary based on faucet type and location. Hiring a professional ensures proper installation and functionality. Always compare quotes from different plumbers for the best deal.
Consider warranty and reputation when selecting a contractor.
Can I Add A Side Sprayer To My Kitchen Faucet?
Yes, you can add a side sprayer to your kitchen faucet if it supports one. Check compatibility with your current faucet model. Installation usually requires a separate mounting hole on the sink or countertop. Consult your faucet’s manual or a professional for guidance.
Can You Add A Hand Sprayer To An Existing Faucet?
Yes, you can add a hand sprayer to an existing faucet. You need a compatible diverter and proper installation. Make sure to check the faucet type and available connections. This upgrade can enhance kitchen or bathroom functionality, offering convenient rinsing and cleaning options.
Conclusion
Replacing a kitchen faucet with a sprayer can be simple. Follow the steps carefully. Gather all necessary tools first. Disconnect old fixtures, then install the new ones. Ensure everything fits tightly. Check for leaks before you finish. Turn the water on slowly.
Listen for unusual noises. If everything works, you did it right. Enjoy your new faucet. It adds convenience and style to your kitchen. Try this DIY project when you need a change. It’s rewarding and useful.